At the conclusion of my previous post where I successfully installed the base Arch Linux system onto my laptop I was now presented with the following sweet login on boot:
Arch Linux 4.12.5-1-ARCH (tty1)
HOST login:
You may recall that I was also able to log in as root to this prompt and confirm my wireless networking was working. So what can I do with my new system? Well for one I can see how much RAM a bare bones system like this uses:
free -m
      total  used   free   shared   buff/cache   available Mem:   1995   47     1882   0     65         1840 Swap:   0    0    0
Nice! Linux on this laptop can run in under 50MB of RAM. That’s pretty impressive! OK let’s get serious. What do I do from here? Well conveniently enough there’s an Arch Wiki page for that too!
First order of business is to set up a non-root user account for daily use:
useradd -m -G wheel -s /bin/bash tyler
passwd tyler
And while we’re at it I figured now would be a good time to install everyone’s favourite sudo program:
pacman -S sudo
With sudo installed we just have to configure it to allow anyone with wheel access (like the user I just created for myself) to be able to use it. Open up /etc/sudoers and uncomment the line that says:
%wheel ALL=(ALL) ALL
Now to test. Log out of the root account and into my new account and run a test command:
tyler$ Â Â sudo whoami
root
Excellent. Because it printed root we know it worked. OK so I’ve already been able to download and install things but I may not be using the fastest server to do so. Arch ships with a little tool that will rank the available package mirrors by speed and help me find the one that should be best for me.
sudo cp /etc/pacman.d/mirrorlist /etc/pacman.d/mirrorlist.backup
sudo sed -i ‘s/^#Server/Server/’ /etc/pacman.d/mirrorlist.backup
su -c ‘rankmirrors -n 6 /etc/pacman.d/mirrorlist.backup > /etc/pacman.d/mirrorlist’
So what do the above commands do? Well first it creates a backup of the existing mirrorlist, then it uncomments all of the servers in that backup list, and finally it runs rankmirrors on the backup list file (so all of the available servers) and takes the 6 (-n 6) fastest servers and outputs them to the real mirrorlist.
Now as cool as a terminal is I kind of want a graphical user interface for my laptop. To begin with I need a display server. As of the writing of this there are two options: the classic and mature X.org and the upcoming replacement Wayland. While I’m sure I’ll be using Wayland some day soon I just don’t know enough about it today to troubleshoot any issues I run into. So instead I’m going to go with some good old fashioned X.org.
sudo pacman -S xorg
I also want to install the 3D drivers and because this laptop only has an integrated Intel GPU it should be as simple as installing that driver:
sudo pacman -S xf86-video-intel
Alright now the big decision: which desktop environment do I want to install? Arch offers quite a few from the normal heavy hitters GNOME, KDE, Cinnamon, Xfce, etc. to some lesser known (and sometimes still in development) offerings like Budgie, Liri and Moksha. Normally I’m a big fan of Cinnamon but I think for the purposes of this laptop I’m going to go with something slightly less resource hungry and install MATE.
sudo pacman -S mate
Uh oh, got a few errors on that one:
:: Retrieving packages…
error: failed retrieving file ‘gdk-pixbuf2-2.36.8-1-x86_64.pkg.tar.xz’
After some furious Googling it seems like my package database may be out of date and it was recommended that I not only update the database but the system as well. This can all be done with the following command:
sudo packman -Syu
With that done let’s try running the command to install mate again and… success! Now that the desktop manager is installed I’d like a login screen to show on boot. The MATE wiki recommends using LightDMÂ so I figured why not?:
sudo pacman -S lightdm lightdm-gtk-greeter
Then once that’s installed I needed to configure it by editing /etc/lightdm/lightdm.conf and adding the following under the [Seat:*] section:
greeter-session=lightdm-gtk-greeter
Last but not least in order for systemd to automatically load LightDM on start up you need to enable it:
sudo systemctl enable lightdm.service
OK let’s see if this works after a quick reboot:
sudo reboot
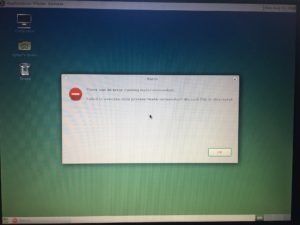
It worked! Well worked-ish.

Looks like the base mate package doesn’t include additional frivolous things like a screenshot application but that’s OK I have a desktop now!
Whew! We’re on our way with this installation. Stay tuned for my future posts where I plan on going  over customizing my system and installing the applications I want to use for my own personalized desktop!

Leave a Reply