Like most of you I have a free Dropbox account that I use to shuffle some files back and forth between devices, as well as share some folders with a few other people. Well the other day I ran into the max device limit for the free version (which as of this writing is 3 devices) and my options were either to pay over $100/year to upgrade my account in order to increase the number of allowed devices or look for an alternative. Well… I think I may have found an alternative.
What’s in a Service?
My list of requirements for a replacement wasn’t long but there were some things that I thought were important to have. Those were:
- File synchronization between unlimited number of devices
- Ability to share specific files and folders with other people
- Cross-platform support (Windows, Linux, Mac, etc.)
- Mobile support on both Android and iOS
- Data ownership
- Secure file transfer (i.e. TLS, etc.)
That point about data ownership was something I was really interested in. While I’m not against commercial cloud storage in all cases I think I would still prefer the ability to host my own files if at all possible. As a result I disregarded the other commercial offerings like Google Drive, Microsoft OneDrive, etc.
In addition to the requirements above I also came up with a number of nice-to-haves that weren’t necessarily deal breakers but would be really cool if I could make happen:
- Additional sync options (i.e. calendar, contacts, etc.)
- Encrypted storage support (at least at rest but ideally end-to-end)
- Minimal cost
- Easy to setup
From one Cloud to Nextcloud
With that in mind I began to look for an application or service that would meet these needs. One such option was Nextcloud. Nextcloud has been around for a while, after being forked from the ownCloud project, and it provides quite a number of neat features like calendar, contacts and most important to this discussion, file sync. It sort of bills itself as a direct Dropbox replacement with an extra apps ecosystem on top.
Here’s a comparison of what Nextcloud offers vs my requirements:
- File synchronization between unlimited number of devices – CHECK
- Ability to share specific files and folders with other people – CHECK
- Cross-platform support (Windows, Linux, Mac, etc.) – CHECK
- Mobile support on both Android and iOS – CHECK
- Data ownership – CHECK
- Secure file transfer (i.e. TLS, etc.) – CHECK
- Additional sync options (i.e. calendar, contacts, etc.) – CHECK
- Encrypted storage support (at least at rest but ideally end-to-end) – Yes, but depends on setup
- Minimal cost – CHECK
- Easy to setup – Debatable. Application itself is very simple to use but it does require a web server setup first…
Looks like we may have found a winner!
Somewhere to Run
So in order to run Nextcloud you first need to have a web server to run it on. You could solve this particular problem in many, many different ways but because one of my priorities here was to own my data I wanted to try and host this on my own hardware, ideally in my own house. Also because my initial intent here is to really test out Nextcloud and see if it could really be a Dropbox replacement I didn’t want to invest too much in new hardware if I could help it.
My first thought was using a Rasberry Pi. As I previous wrote about, I already had a Raspberry Pi running pi-hole on my home network and this would have been an ideal place to expand to include Nextcloud as well… Unfortunately the latest version of Nextcloud (as of this writing) requires PHP7.2 and that is not currently available on Raspbian.
My next best option was an ancient Lenovo laptop that I had kicking around doing nothing. This old machine was built to target Windows XP (allegedly Windows Vista Capable… yeah right…) and ran an Intel Core2Duo with 2 GiB of RAM. I figured this would be more than enough to run a simple web server for my tests.

I grabbed a copy of Debian 10 and began the installation.

During the installation I chose the option to use LVM and LUKS disk encryption in order to make sure my files remained encrypted at rest. Doing this helped to achieve one of my listed goals from above.
So Dynamic
While the install was happening I had to tackle my next challenge: if this server was going to run on my home network I would need to figure out a way to make it publicly accessible without having a dedicated static IP address. Thankfully there are many dynamic IP address services out there that allow you to setup a domain that points to your home’s public IP address. So something like dynamic.someservice.example would resolve to the aaa.bbb.ccc.ddd IP address of your house.
I signed up for such a service and then set my installing server’s name to match (which I guessed would be important later when I figured out how to get TLS working…). At the same time I also setup an automatic process for renewing and updating this dynamic hostname to always point to my current home public IP.
Because it’s generally frowned upon to have very popular public ports (i.e. port 80, 443, etc.) at your home listening on the internet I decided to setup port forwarding. I chose a random port and had that port externally forwarded to port 443 internally on my web server. This provides very little protection but hey it’s better than nothing.
Meat and Potatoes
With Debian installed I next had to actually setup Nextcloud. There are many different ways to host websites on a Linux server and many different ways to setup Nextcloud. For this test I decided to follow a very basic example using some of the steps found here.
For the web server I went with the old faithful Apache. Nextcloud runs on PHP and needs a database to store its settings, so I also installed MariaDB and various required PHP packages. Like I mentioned above YMMV on this step and there are many different options here.
sudo apt install apache2 mariadb-server libapache2-mod-php php-gd php-json php-mysql php-curl php-mbstring php-intl php-imagick php-xml php-zip
With those installed I then needed to actually get the Nextcloud software. The latest version at the time of writing was 18.0.1 so that’s what I grabbed:
cd /var/www/html
sudo wget https://download.nextcloud.com/server/releases/nextcloud-18.0.1.zip
With the zip file downloaded the next step was to unpack it and update the file permissions:
sudo unzip nextcloud-18.0.1.zip
sudo chmod 750 nextcloud -R
sudo chown www-data:www-data nextcloud -R
And with that the files were extracted and Nextcloud was ready to set up. But first I needed to configure my database and user. Again I followed these instructions:
sudo mysql
CREATE USER 'nextcloud' IDENTIFIED BY 'my-secret-password';
CREATE DATABASE nextcloud;
GRANT ALL PRIVILEGES ON nextcloud.* TO 'nextcloud'@localhost IDENTIFIED BY ‘my-secret-password’;
FLUSH PRIVILEGES;
quit
Where I replaced my-secret-password with a real strong password.
Before continuing I did a quick system update and reboot. I don’t think this was strictly required but hey that’s what I did.
Valid Certificates
When the server was back up I wanted to see about grabbing a TLS certificate before continuing. After all if I couldn’t get this to work then I wouldn’t be able to establish a reliable secure connection and that would fail one of my requirements above.
For this application I decided to use Let’s Encrypt and grabbed certbot for Debian 10/Apache by running:
sudo apt-get install certbot python-certbot-apache
With that installed I needed to actually generate and request the certificate. There are a few restrictions in place on how this works and one of them is that your server must be reachable on port 80. Because of this I had to temporarily add a port forward from external port 80 to internal port 80 on my web server. I then ran the following command:
sudo certbot --apache
This walked me through setting up the certificate and was honestly quite quick and painless. After the certificate was in place I once again disabled port 80 forwarding. The downside to this was that certbot won’t be able to automatically renew my certificate and so I’ll have to manually go in and periodically allow port 80 through to request future certificates. It’s a bit of a pain but I think the trade off is worth it.
For my future self: to manually renew the certificate just run:
sudo certbot renew
OK so now I had a real, valid TLS certificate on my dynamically IP’d home server with Nextcloud installed and ready to be configured. All that was left was to setup Nextcloud!
Surprisingly Straight Forward
Assuming I did everything right I should have been able to browse my Nextcloud install by going to my dynamic IP address and the port that I chose to externally forward to my internal server. For example assuming the dynamic hostname is dynamic.someservice.example and the external port forwarding is set to use port 1234 I would browse to:
https://dynamic.someservice.example:1234/nextcloud
Thankfully this worked perfectly and I was taken to a page where I was walked through setting up Nextcloud. For the database connection I used the database credentials I setup above with host set to localhost. Again everything seemed to work without any issues and I finally had my install complete!
Remote Clients
The Nextcloud web interface is nice but honestly there’s still something to be said about having a somewhat native/transparent file sync as well. So I downloaded the Nextcloud desktop sync application and was able to get it working in no time at all. Here’s a sample image of the desktop client taken from the Nextcloud website:
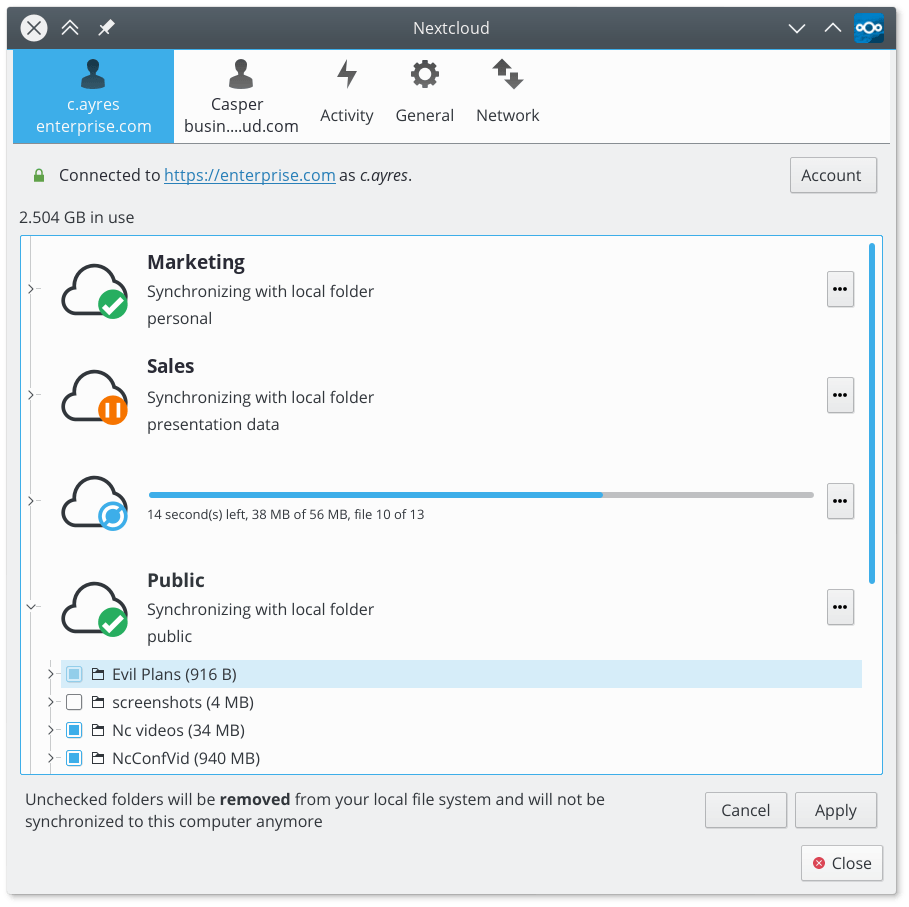
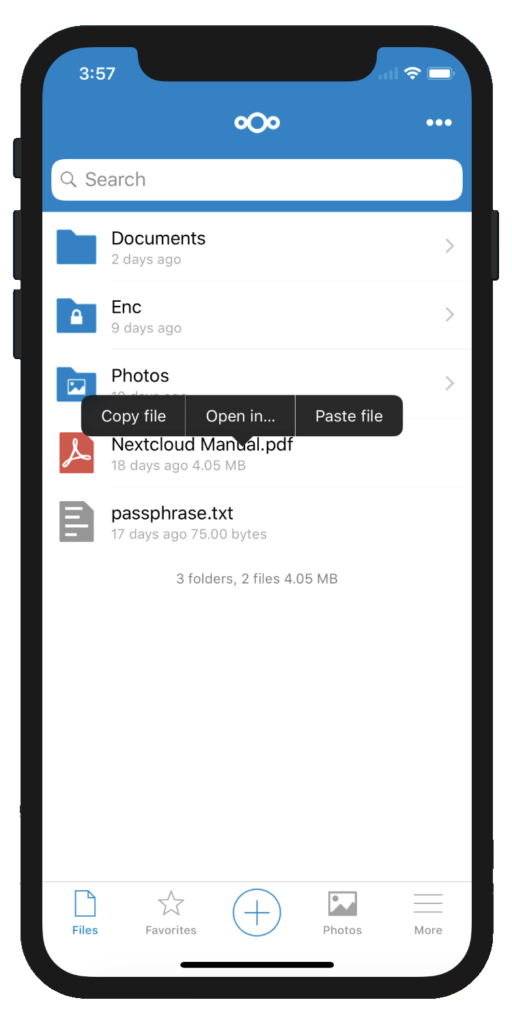
I also downloaded the iOS and Android apps and again there everything just worked. Similar sample image from Nextcloud website below:
Success?
So far everything is working really well with my test setup and I’m optimistic that this will actually be a pretty uneventful in-place replacement of Dropbox.
If you’re planning on trying something similar yourself – and I think you should! – I would be remiss if I didn’t point out that you now need to be responsible for your backups. Unlike Dropbox where the company ensures that your files will never be lost, you are now hosting everything and therefore that responsibility falls on you. How you approach this is up to you but whatever you do don’t forget to do something!

Leave a Reply