Unlike many people who may be installing a version of Linux, I am doing so on a machine that has a projector with a 92″ screen as it’s main display.
So, upon initial installation of Kubuntu, I couldn’t see ANY of the text on the desktop, it was itty bitty.

In order to fix this, I had to hook up an additional display.
Thankfully, living in a house with a computer guru, I had many to choose from.
In order to get my secondary display to appear, I had to first plug it into the display port on the machine I am using. I then had to turn off the current display (projector) and reboot the machine so that it would initialize the use of my new monitor.
Sounds easy enough, and it was, albeit with some gentle guidance from Jake B.
From here, I am able to properly configure my display.
The thing I am enjoying most about Kubuntu so far is that it is very user friendly. It seems almost intuitive where each setting can be found in menus.
So these are the steps I followed to change my display configuration.
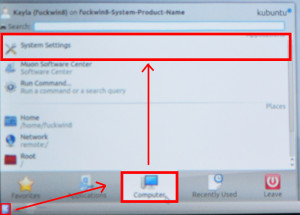
I went into Menu > Computer > System Settings

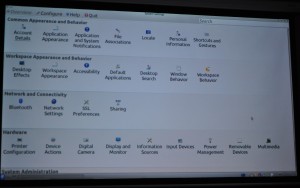
Once you get into the System Settings folder, you have the option to change a lot of things. For example, your display resolution.

Now that you are in this menu, you will want to select Display and Monitor from the options. Here you can set your resolution, monitor priority, mirroring, and multiple displays. Since I will only be using this display on the Projector, I ensured that the resolution was set so that I could read the text properly on the Projector Screen. Before disabling my secondary monitor, I also set up my Bluetooth keyboard and mouse, which I will talk about in another post.
This process only took a few moments. I will still have to tweak the font scaling, as I have shit-tastic eyesite.

Leave a Reply